Getting Started
The newest version of numl is designed to work on the .NET platform (as much as we could reach). This tutorial is designed to get you started on (hopefully) any platform. This is all CLI based.
Installing .NET Core
Installing .NET Core should not be too difficult if you follow the instructions outlined on the Getting Started page. There are several links for installing the bits depending on your OS.
Initializing a Project
- Create a folder for your project
- cd into it and
dotnet new console- this will create a basic console application - Next we will add
numl(and its dependencies) to the project via NuGet. Rundotnet add package numl -v 0.9.9-*. This modifies the.csprojproject file as follows:
<Project Sdk="Microsoft.NET.Sdk">
  <PropertyGroup>
    <OutputType>Exe</OutputType>
    <TargetFramework>netcoreapp1.1</TargetFramework>
  </PropertyGroup>
  <ItemGroup>
    <PackageReference Include="numl" Version="0.9.9-*" />
  </ItemGroup>
</Project>```

These were the lines added:

```xml
  <ItemGroup>
    <PackageReference Include="numl" Version="0.9.9-*">
  </ItemGroup>
If you are using Visual Studio Code and edit the project file manually, it will ask you to update the dependencies.
Writing Some Code
Add the sample Iris.cs code to your project folder. I added some
code to my Program.cs file to test things out (it ended up looking like this):
using System;
using numl.Model;
using numl.Supervised.DecisionTree;

namespace ConsoleApplication
{
    public class Program
    {
        public static void Main(string[] args)
        {
            Console.WriteLine("Hello World!");
            var description = Descriptor.Create<Iris>();
            Console.WriteLine(description);
            var generator = new DecisionTreeGenerator();
            var data = Iris.Load();
            var model = generator.Generate(description, data);
            Console.WriteLine("Generated model:");
            Console.WriteLine(model);
        }
    }
}
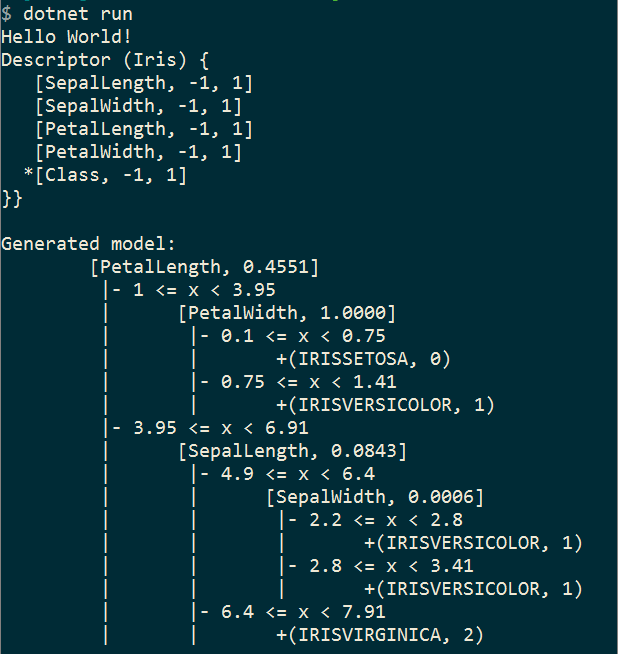
Running the code
- Run
dotnet restoreif you've made further changes to the.csprojfile - Run
dotnet run
